
Workflow reference
Selection, evaluation & AI
Use the controls and worked examples together. Individual sections identify edition-specific tools.
Comparison: make two sources easier to match.
ProfessionalProfessional overlays two sources in Picture, Waveform, Vectorscope, Color Balance Plot, or Quad Balance views. Choose Waveform + Vectorscope at the top of the lower scope-type list to show the comparison waveform on the left and vectorscope on the right. Both graphs use the same aligned inputs and comparison mode.
Separate Waveform and Vectorscope settings buttons expose each graph's controls; wheel shortcuts follow the graph under the pointer. The selection saves with the workspace. In Side-by-side source mode, each graph shows source 1 then source 2. The combined view reuses the standard GPU CRT and density renderers, with independent settings for each graph and CPU fallback where required.
Complementary colors identify each input; a Mix display blends them. Choose Side-by-side in the lower scope pane to see source 1 left and source 2 right in complete views. Hover over either view for small linked rings at the same relative position in both. The rings clear when you leave the graph; the upper source preview keeps its own mode. Side-by-side supports the individual and combined comparison views and saves with the workspace. Focus the picture or graph and hold top-row 1 or 2 to inspect that source alone in both panes. Release to restore the comparison, split and color settings; if both keys are held, the last pressed wins. Moving focus or deactivating the window cancels the temporary view.
Click a selected Green / Magenta, Blue / Yellow, or Red / Cyan button again to toggle luminosity tinting and source channels. Source-channel mode retains the assigned RGB components from each input layer; equal pictures retain their color. A stepped icon mark and tooltip identify this mode. Measurement scopes use rendered trace channels, so monochrome traces can look unchanged. Both selectors save their independent modes with the workspace. Amber / Blue and Rose / Teal add to neutral gray for equal contributions, with closely matched full-intensity sRGB luminance. Apparent brightness balance can vary at lower trace intensities. Source preview and scope display selections are independent and saved with the workspace. Instead of remembering one camera while looking at the next, compare their behavior in the same place.
During rehearsal: choose the Match faces selection mode beside 1 / 2 and select a person from source 1 in the dark-themed face list. Local face recognition finds the same person in source 2, matches face heights, aligns both coordinates using the eye midpoint, and follows live framing changes. Face ellipse masks marked by subtle, unfilled outlines isolate the measurement scopes from the background. Frozen inputs and previously captured reference images can also guide camera setup. Display, trace width/intensity/persistence, guides, performance and GPU/defaults controls are beside the lower scopes pane and follow its selected view.
Small or strongly angled faces may need more detail. Brief detection gaps retain the face selection and alignment while uncertain measurements pause. The last valid scope image remains visible for up to three seconds with a hold status, then clears if matching has not recovered. Masked measurements use CPU rendering and preserve native source precision. Different lighting, gamma settings and source delays can still create differences; this is a setup aid, and the sources are not time-synchronized.
A reference you can keep in view
Freeze either source independently, isolate picture channels, and zoom or pan the picture for a closer inspection. Waveform magnification helps examine a smaller range of signal levels.
The overlay compares the latest available frames, without timestamp synchronization. Use a steady subject for camera matching; movement or different capture delays can create differences unrelated to exposure or color.
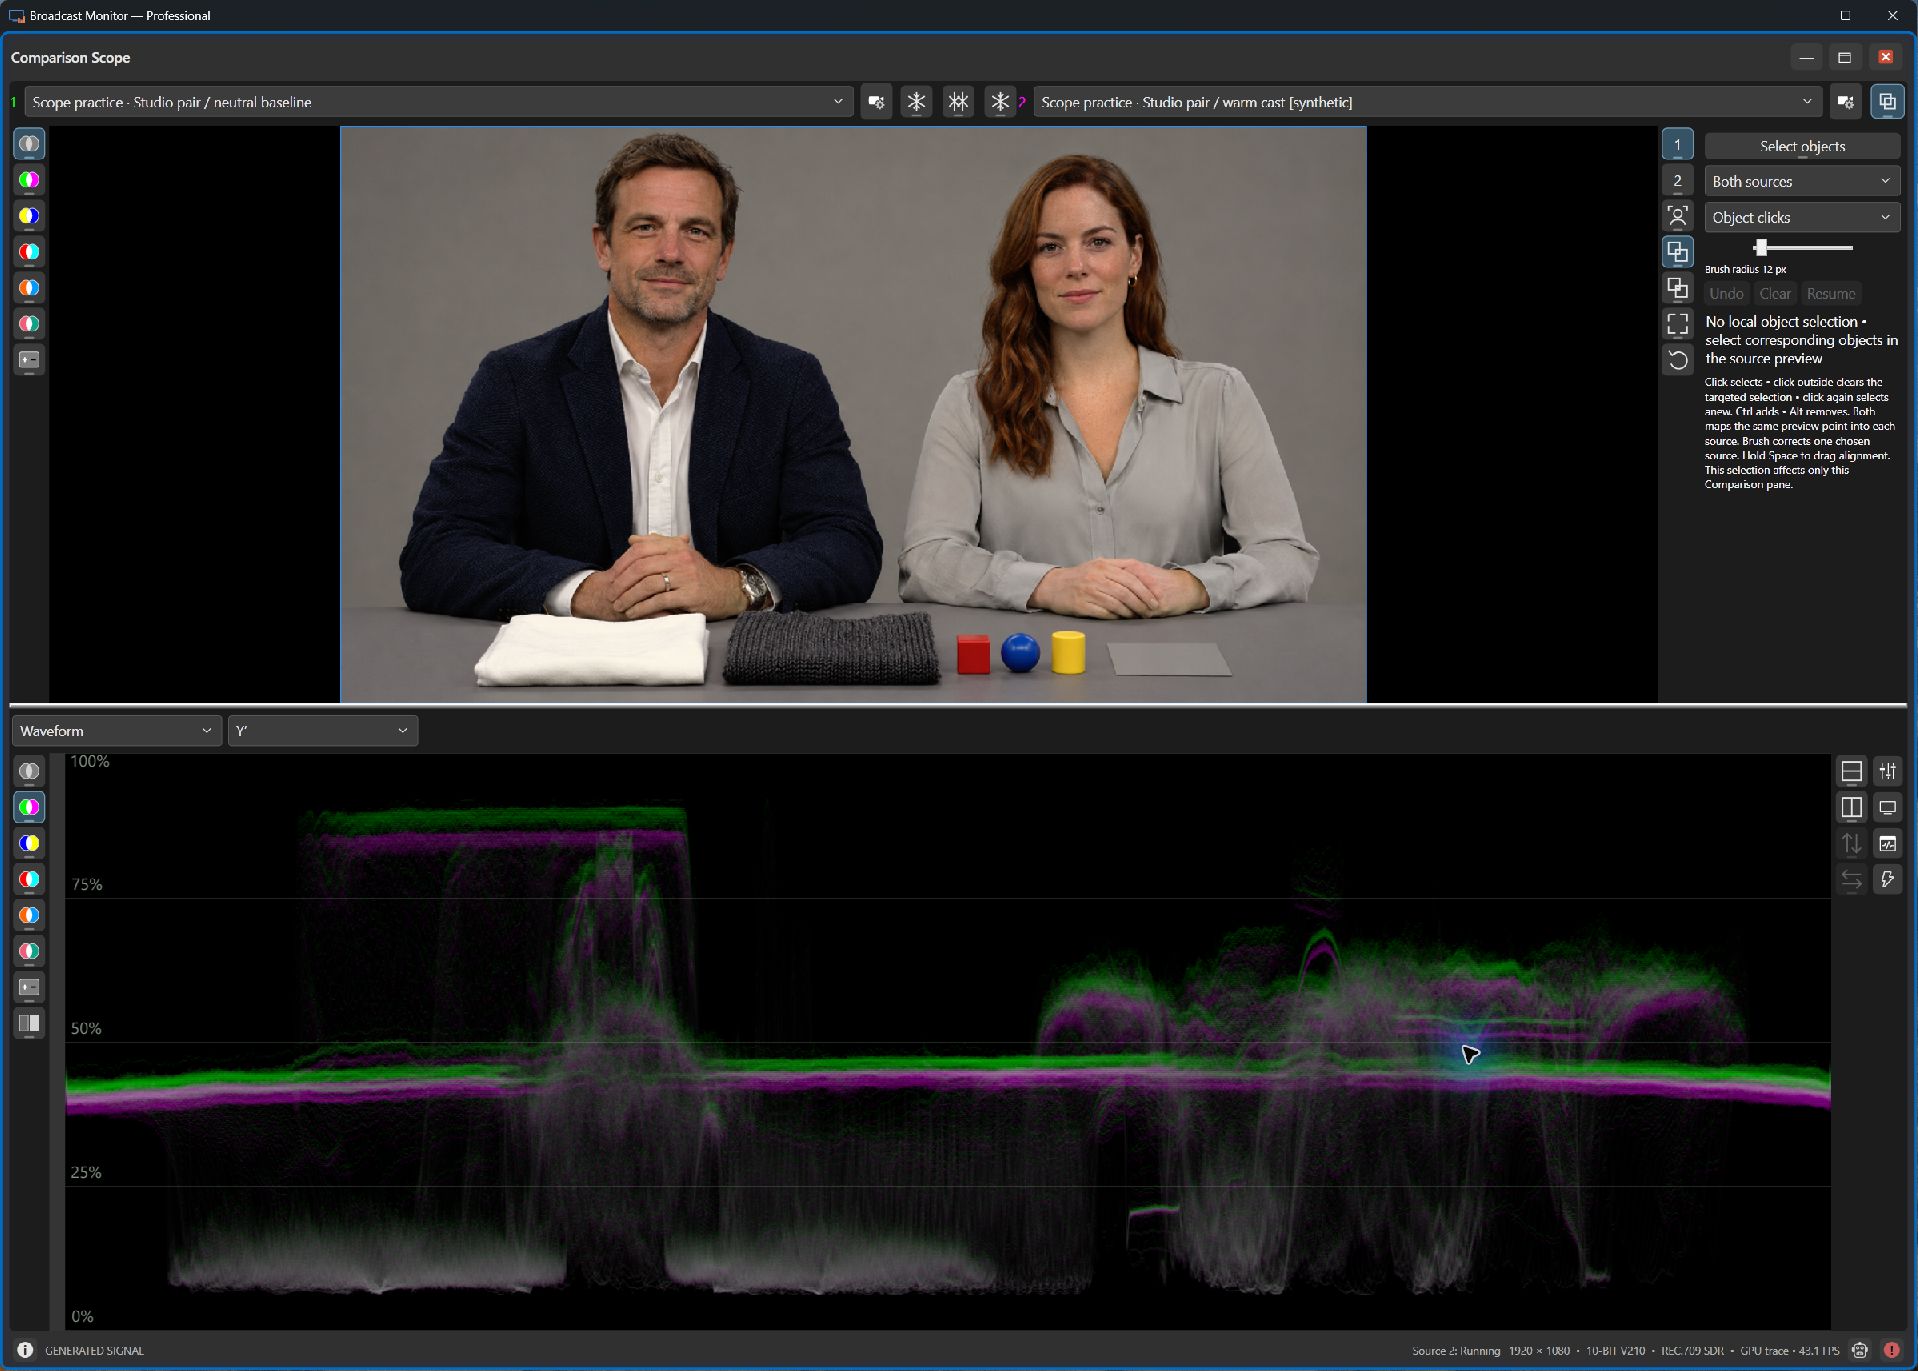
Click any screenshot to open the larger view and inspect the controls and traces.
More ways to understand color.
ProfessionalIncluded in Professional, these views answer different questions about the same signal. Keep the ordinary picture nearby so measurements stay connected to your creative intent.
Hue / Saturation picture
This view preserves source chroma while holding encoded brightness at a fixed middle level. Removing brightness variation from the display makes color differences easier to inspect.
Try it when matching cameras: look for a color cast on a neutral subject or differences in stage-light color, then return to the normal picture to judge the result.
CIE xy chromaticity
Chromaticity places colors on a two-dimensional map with a gamut triangle as a reference. A gamut describes a color space's range of colors; the plot helps you see where the signal falls relative to that reference.
Follow source metadata or choose a reference such as Rec.709, P3, or Rec.2020. Unknown source metadata defaults to Rec.709, so confirm the source interpretation before drawing conclusions.
Color Balance Plot
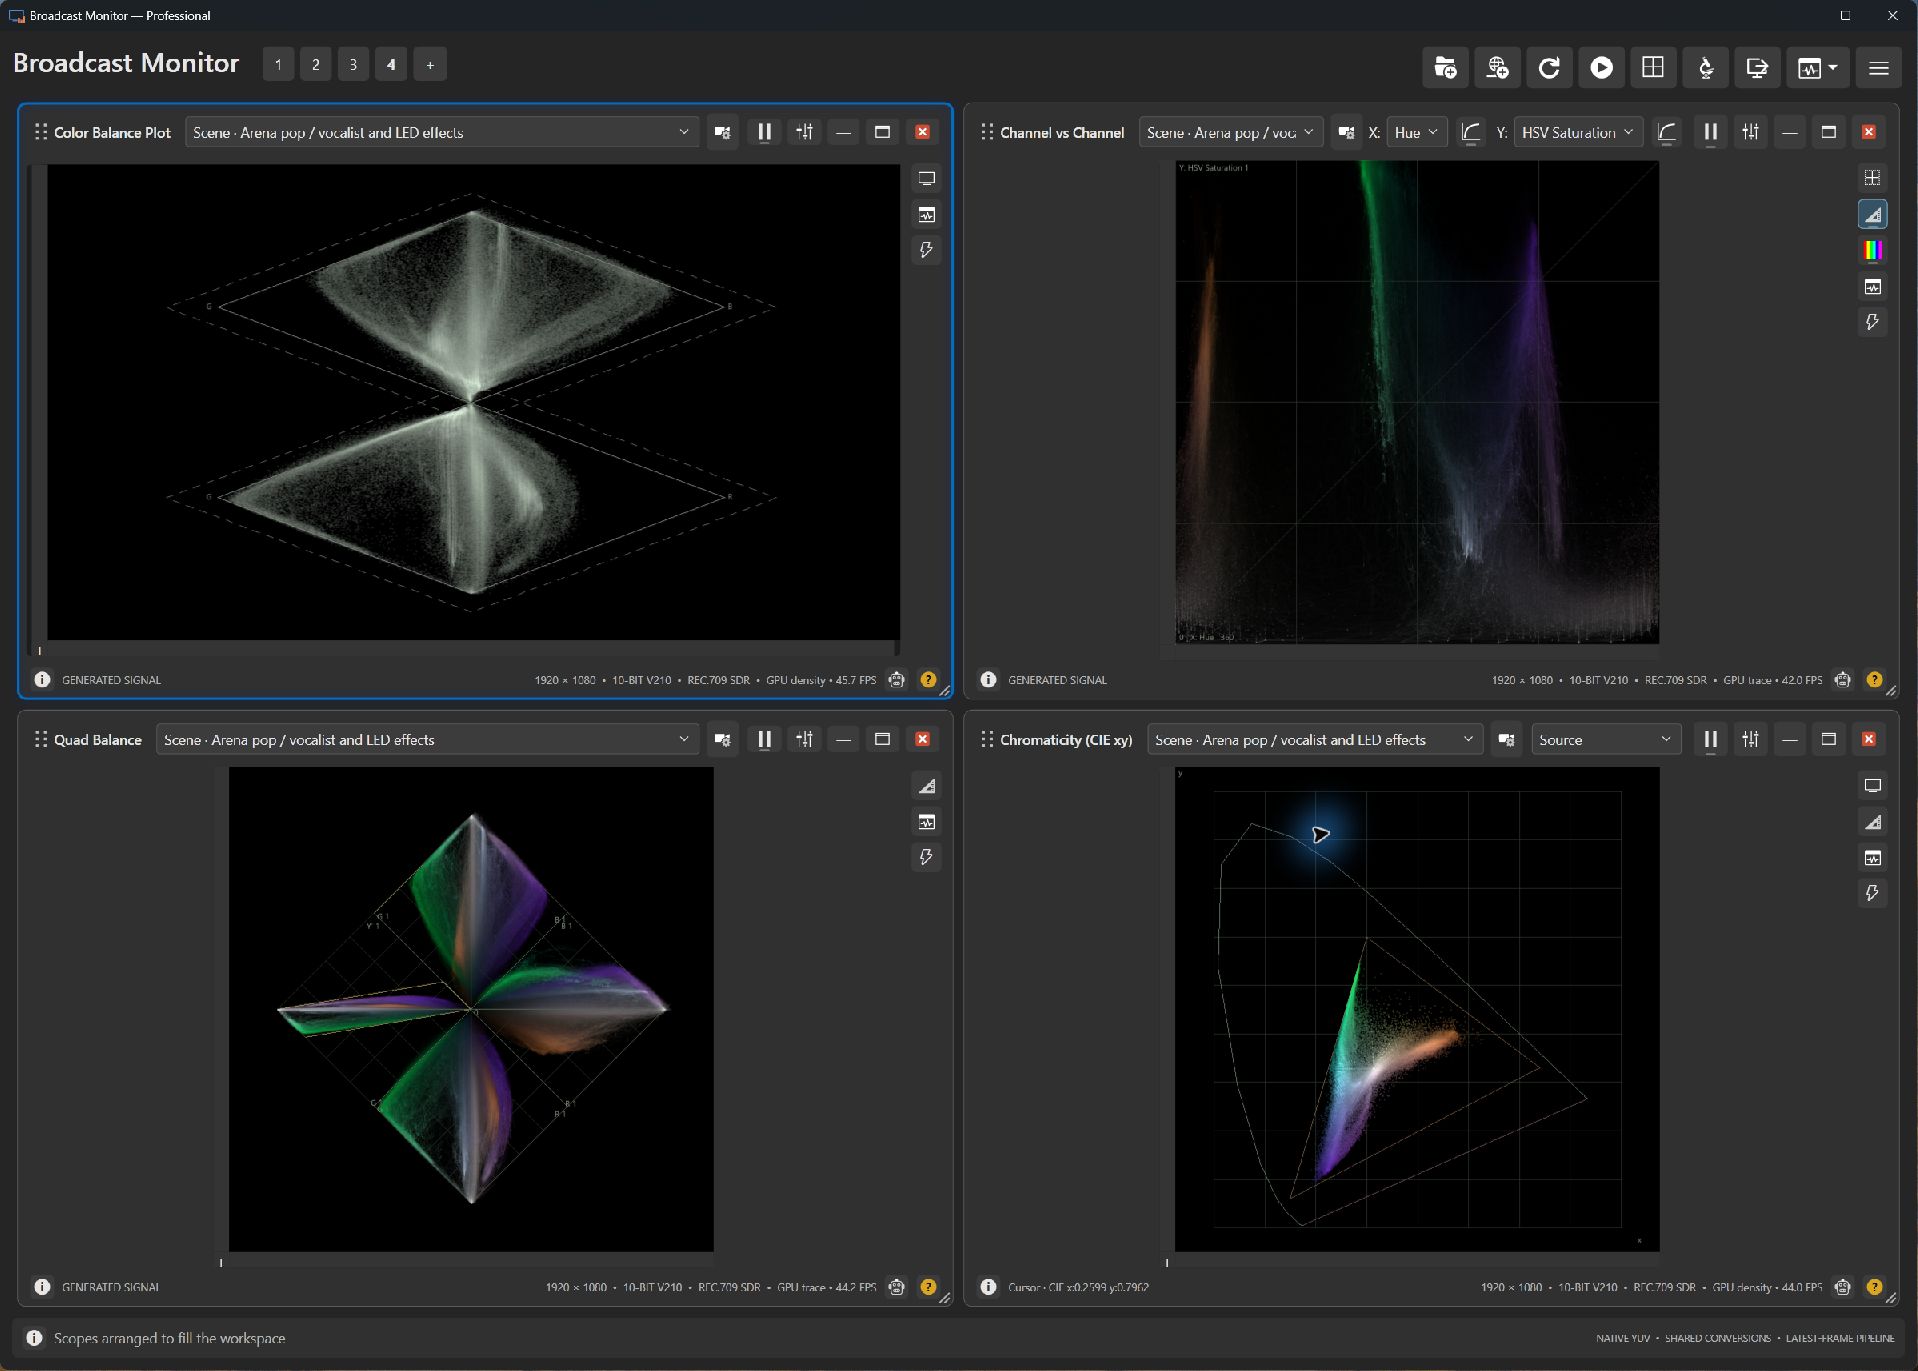
Color Balance Plot offers RGB gamut and channel-balance displays, including double-diamond views that compare green with red and green with blue. Traces outside the reference diamonds reveal RGB values outside the nominal range.
Try it with vivid lighting or graphics: investigate excursions that a pleasing picture might hide. Values outside the range remain visible in the analysis instead of being clipped away before plotting.
Captions: check the words as well as the picture.
ProfessionalProfessional includes a Caption Data scope for supported CEA-608/708 text, plus an optional picture overlay with caption-channel or service selection. Watch text changes and clears, with source timecode when available, to help check that the expected captions are arriving.
This is plain-text monitoring, not a complete reproduction of broadcast caption styling and positioning. Enabled picture captions are included in composed monitoring output. They are rendered text in the output picture, rather than outgoing SDI ancillary caption packets.
Ancillary data: investigate what changed.
ProfessionalTimecodes and other metadata can travel alongside a video frame. Professional's Ancillary Data scope lists the fields supplied by the source, highlights changed values, and retains a rolling minute of snapshots. Browse a moment or double-click a field to examine its history while capture continues.
Blackmagic capture can expose timecodes and SDI ancillary packets, including supported caption payloads. Available fields depend on the signal and adapter. Embedded metadata availability depends on the decoder. Local audio transcription can also supply derived caption text, including from an independently selected audio source.
Keep a native reference. Match the next camera.
ProfessionalProfessional can capture native reference frames into portable collections and route them into Picture, Waveform, and Vectorscope views. Compare a saved reference with a live input instead of relying on memory. Add editable measurement guides to supported scopes, and select an area of interest to share a region with supported analysis views.
Channel vs Channel plots any two of 18 components from the same pixel: linear Y/R/G/B, encoded Y′/R′/G′/B′, Hue, HSV Saturation, HSL Saturation, Cb/Cr, Chroma Magnitude, RGB Min, RGB Max / Value, RGB Lightness, and RGB Chroma. Presets include Chroma vs Lightness and HSV Saturation vs Value. Each axis has its own logarithmic toggle; a dim hue background is available when either axis is Hue. RGB-derived extrema retain excursion margins. RGB Lightness is an encoded midpoint, not perceptual lightness; Value is maximum RGB, not luminance. Quad Balance brings channel relationships into a four-quadrant display. The rotatable 3D Scope offers RGB, YCrCb, YHS, HSV, CIE XYZ, and CIE LAB color volumes with enlarged axis labels and values outside the projected volume. Labels retain their side while rotating until another edge is clearly better. Optional Color reference planes (off by default and saved with the pane) show dim slices on the three rear walls as you rotate, using the actual wall coordinate for the missing axis, switching between minimum and maximum as you rotate. HSV uses hue angle, saturation radius, and maximum encoded RGB channel (Value) height. Out-of-gamut colors are clipped; YHS/HSV use Cartesian saturation coordinates.
Keep faces and shot decisions in view.
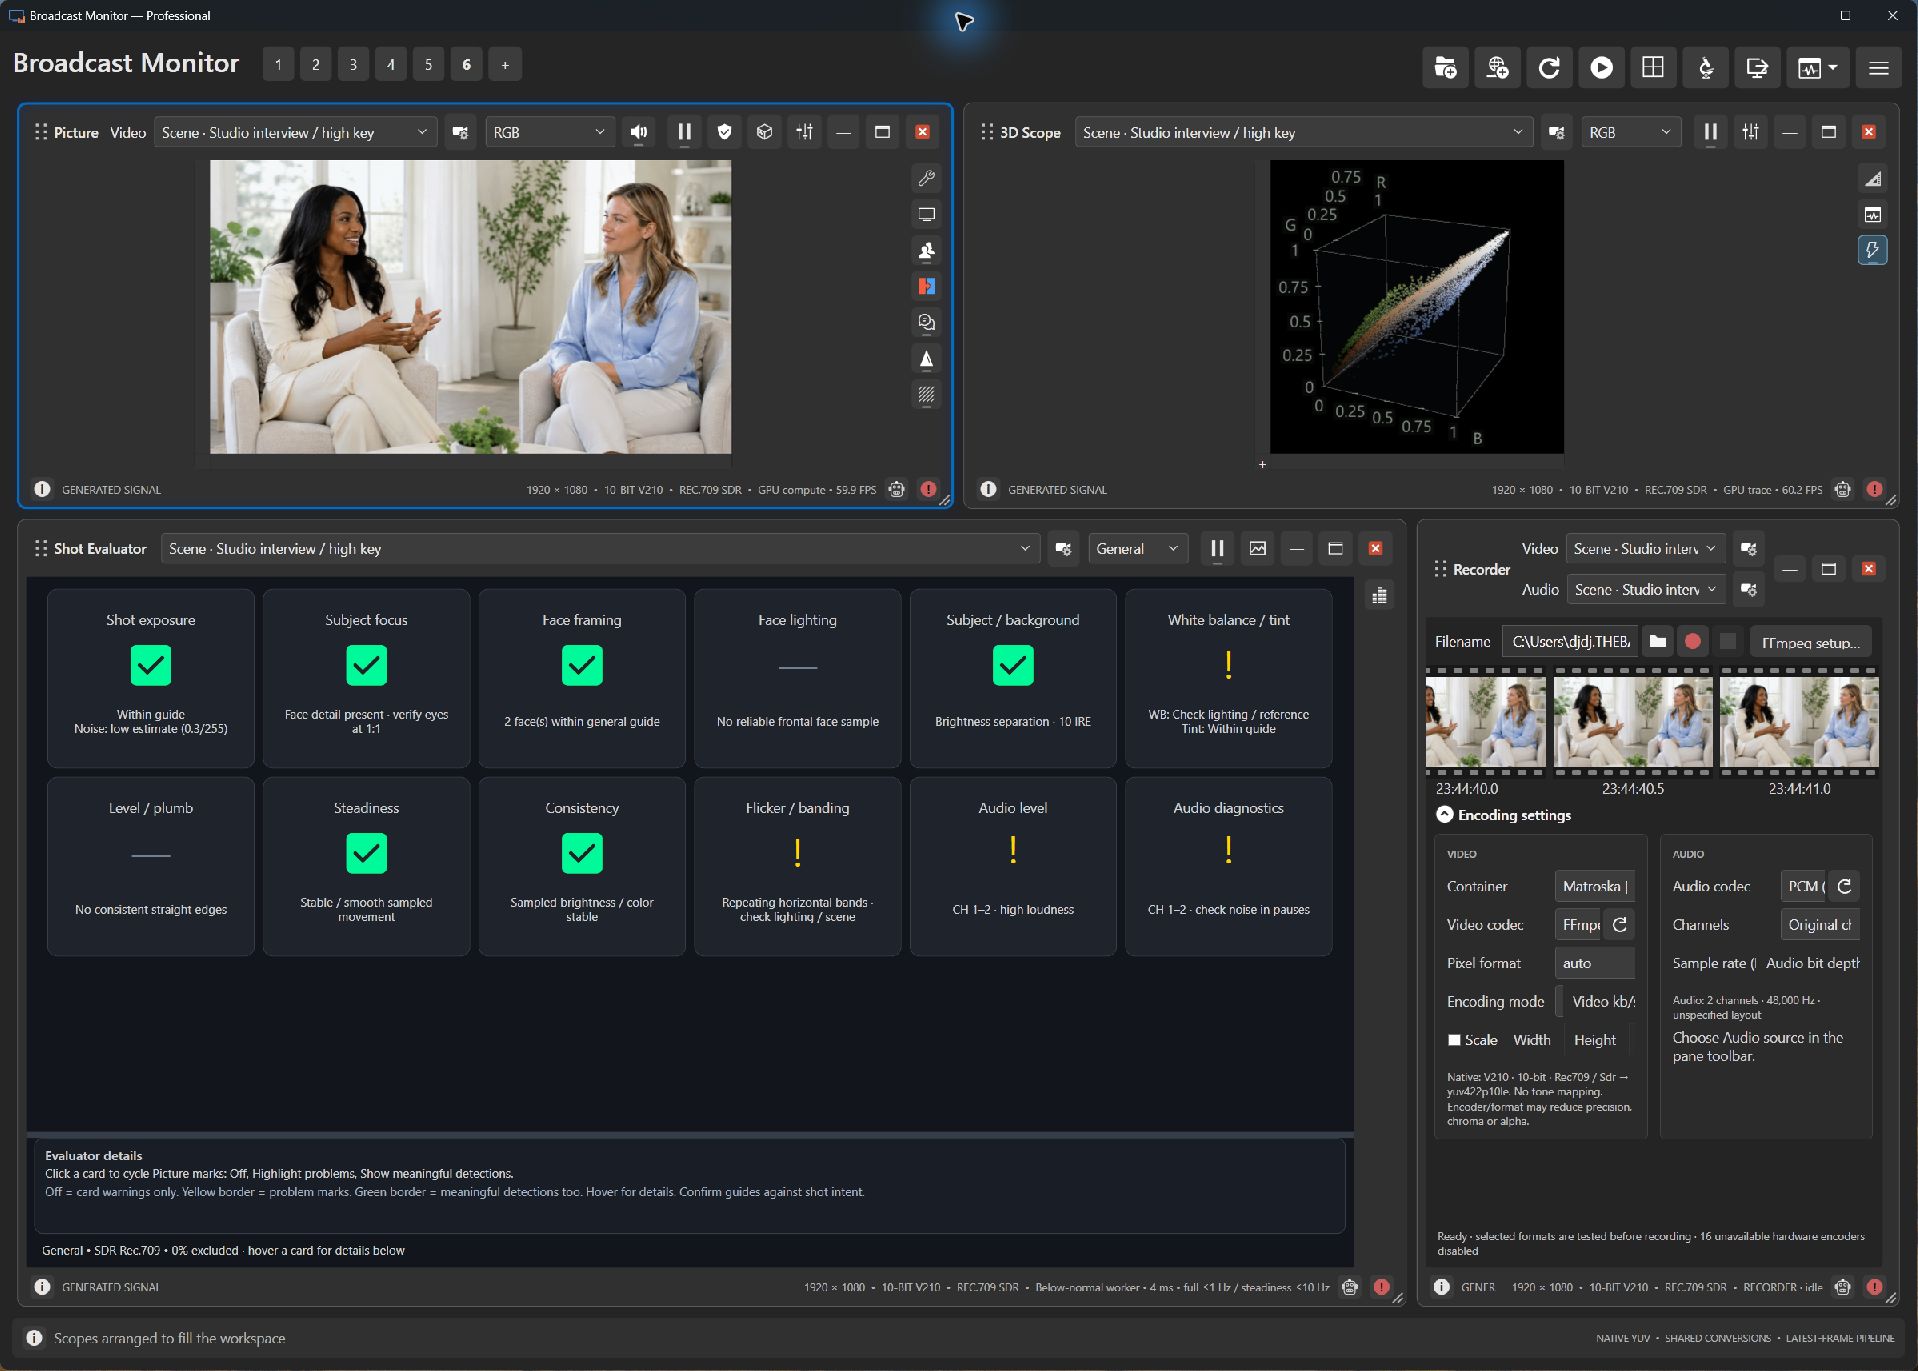
ProfessionalProfessional includes Shot Evaluator. Shot Evaluator brings exposure, color, focus, lighting, composition, temporal behavior, and audio guidance together.
These guidance cards depend on scene content and detection quality. Treat the suggestions as prompts for inspection, listening, and production judgment. Source, LUT, or analysis-area changes invalidate previous video guidance. A held analysis image cannot establish motion, flicker, or temporal consistency.
See the last 15 seconds of waveform.
ProfessionalOpen it from Add scope or the cube-and-waveform icon in the Waveform toolbar. The icon uses the same source and brings a matching open pane forward. Professional adds 3D Waveform: a rotatable waterfall with horizontal picture position, signal level, and age from 0 to 15 seconds. Choose all the same components as Waveform, in the same order: luma/luminance, parades, encoded RGB, linear RGB, chroma components, hue, saturation, and RGB-derived values. Component layout offers additive Overlay or separate labeled Tiled panels. Hue uses degrees and Cb/Cr use centered chroma units; other axes use percent. Luma/Chroma pairs luma with hue bands whose width indicates saturation. Color-mode edition restrictions match Waveform. New panes opened from Waveform inherit the selected component. Each layer has 192 horizontal by 128 level bins per component. Adaptive source sampling targets about 96,000 pixels per layer; levels are binned, while intervening pixels are skipped. Supported native RGB and linear-luminance paths use SIMD acceleration with a scalar fallback, alongside GPU-backed presentation. Up to ten sampled waveform distributions per second recede through the rolling window, with opacity fading linearly from 100% at 0 seconds to 10% at 15 seconds. Layer depth thickness matches the gap between layers. Drag to rotate, wheel to zoom, and double-click to reset the camera. Clear history starts fresh; changing source or component clears it too. Freeze pauses collection, and expired slices disappear on resume. Camera and component choices are saved; history is transient. This is sampled visual history, not a frame-perfect recording or a legality verdict.
Keep the current picture. See what came before.
ProfessionalProfessional adds 3D Picture and 3D Histogram alongside 3D Waveform. Each scope can be added independently, or opened on the same source with the cube icon in Picture or Histogram.
3D Picture
The age-zero plane shows the latest live frame on every render, with RGB, Y′, or linear luminance modes. Behind it, two 192 by 128 snapshots per second emerge smoothly from behind the live image and recede continuously with age through a rolling 15-second stack, preserving source aspect and fading to 10% opacity. Thin shaded edges keep the pictures visible from the side. The timing grid sits underneath the pictures, hidden by opaque image areas. Depth is time, not brightness or scene distance. Rotation determines which planes overlap; the live plane is not a screen overlay. Age labels remain visible without picture-row rulers.
3D Histogram
All 22 standard Histogram components, including HSV, become a waterfall: component level across, sampled-pixel population percentage vertically, and age in depth. Each of the 192 discrete bins is a full-width bar with shaded faces and history-layer depth, rather than an interpolated line; empty bins remain empty. Histogram layers fade linearly from 80% opacity when new to 10% at 15 seconds. Choose additive Overlay or labeled Tiled panels and a Linear or Logarithmic population scale. Height uses each component's total sampled population, with a fixed 0 to 100% range, rather than normalizing each frame to its tallest bin. Up to ten layers per second retain 15 seconds of sampled history.
Drag to rotate, wheel to zoom, double-click to reset, or Freeze to pause. Clear history starts fresh; source/component changes clear retained history. Changing histogram count scale also clears it. Saved panes retain display settings, while temporal images and measurements remain transient. Timing and axis grids sit beneath the geometry across all three history views; scope titles stay above it. GPU rendering is enabled by default for projection, depth faces and blending across all three history views. Scope settings offers a CPU fallback. Native sample analysis remains on the CPU; raster capture/export consumers and unavailable GPU paths use CPU drawing. These sampled histories do not replace frame-accurate playback or compliance analysis.
Find the value behind the warning.
ProfessionalHDR Luminance
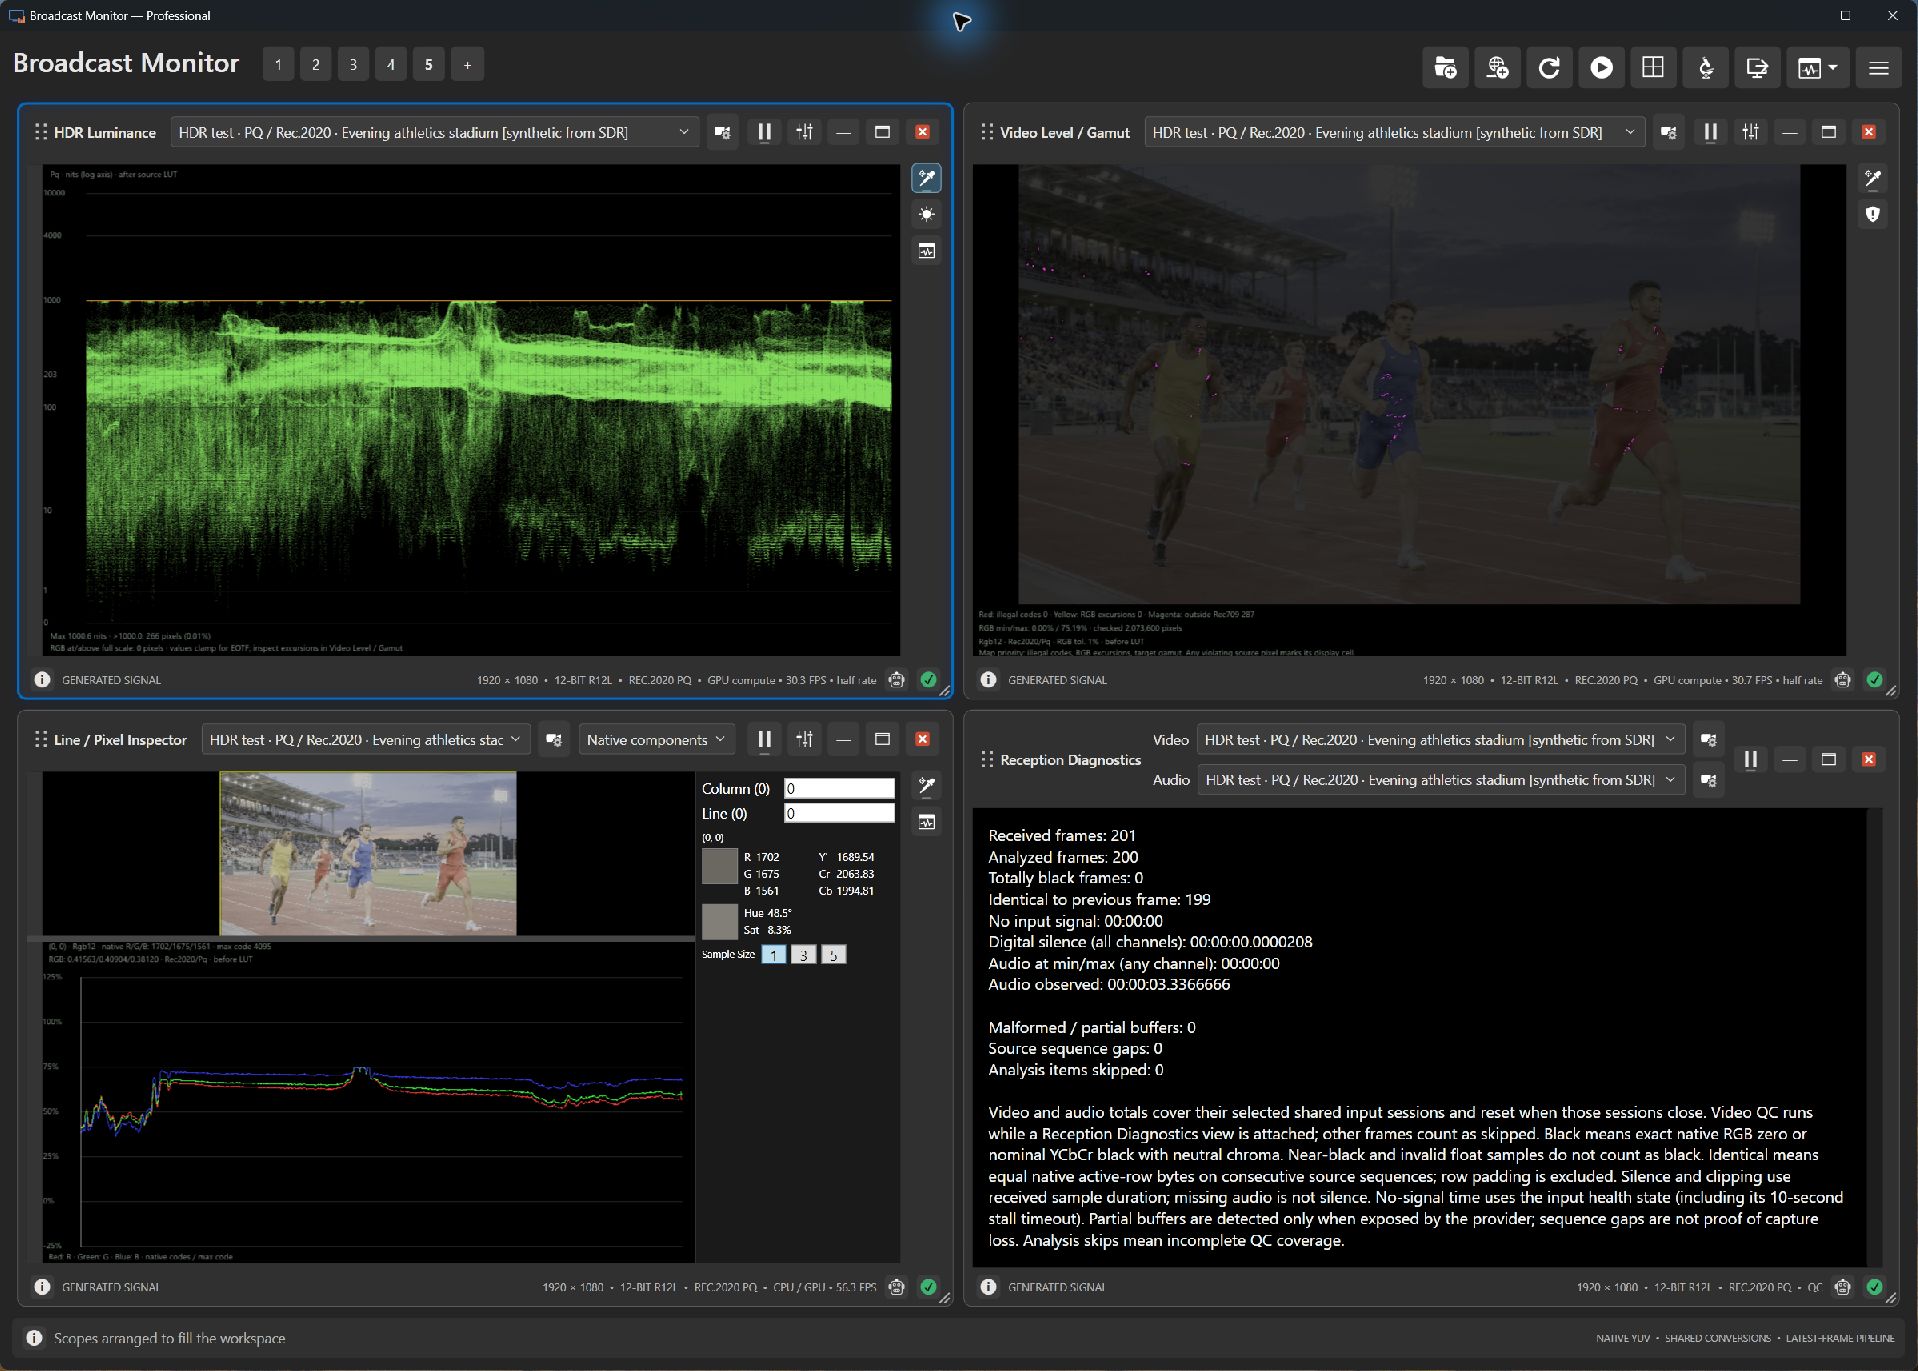
Inspect PQ or HLG luminance and highlight limits with the source's transfer interpretation. The bundled HDR photographs are synthetic encodings of SDR originals; the screenshots demonstrate analysis, not physical HDR display output.
Video Level / Gamut and Line / Pixel Inspector
Locate native-code, RGB-range, and target-gamut excursions, then examine a selected scanline and exact pixel code values. RGB min/max retains measured extremes below 0% or above 100% without clipping the readout.
Reception Diagnostics and Audio / Video Sync
Inspect input counters and signal/audio durations. Use a suitable flash-and-beep test signal for sync measurement; independent sources use arrival-time estimates instead of shared source timestamps.
Local AI Object Selection in Professional.
ProfessionalProfessional supports local AI Object Selection. Configure a local model in Workspace menu > App settings > Object selection, save and restart. Then choose Picture Tools > Object Selection: click selects, a plain outside click clears while keeping the frame frozen, and a second click selects anew. Inside clicks retain the selection. Ctrl-click adds and Alt-click removes. Picture Shift monochrome/Ctrl inversion are disabled while Object Selection is active. Brush correction, Undo, a selection overlay, Clear and Resume support manual refinement. Clear keeps the frame frozen with unrestricted analysis; Resume returns video scopes on that input to live analysis. The existing Pause/Freeze button (Ctrl+Space) also reflects selection freeze; unpausing an affected video scope clears the mask and resumes the input. Other panes paused manually stay paused. Audio and recording continue.
Pause when selecting an object in App settings is global and on by default. With it off, fixed masks apply to live video and outputs without tracking. Save applies the preference to new selections; existing selections and manual holds keep their state. Refinement uses the retained click-time image; Resume clears the selection before choosing from a new image.
The Picture tool is always visible, disabled until a model loads; its tooltip explains setup. Model loading is disabled by default. Choose Download models in App settings for guided setup, or browse to an existing pair. The guided download shows source/license links, location, progress and cancellation, and verifies the complete pair before selecting it. Then choose CPU or GPU, Save and restart to enable it. An explicit launch option can override saved setup. Separately supplied verified upstream model exports are also accepted; a complete legacy community pair remains accepted. Mixed or modified files are rejected. Model/runtime notices ship beside the app; model files are not bundled, and download only when requested.
Comparison adds Select objects in its upper source preview. Both sources is the default: one preview click creates independent masks for both images; Source 1 or Source 2 supports local correction and brush strokes. Outside-click clearing follows that target, preserving the other source for source-only edits. Its frozen pair is local to that pane and preserves Picture-owned input selections. Existing individual source holds return on Resume.
Editor contours, fills, prompts and frozen badges stay out of saved images and outputs; measurements retain masks and Picture keeps full context. Frozen object selections in 3D Picture, Waveform and Histogram hold one age-zero layer without drifting or fading; mask edits and Resume reset selected history. Video Violations and Line Inspector keep contextual image previews while restricting measurements to selected pixels. A separate verified model ZIP can be prepared locally. This remains an experimental workflow. Check selection quality and responsiveness on your actual camera images before relying on it during production.
Read local audio transcription beside captured captions.
ProfessionalProfessional can transcribe a selected audio channel locally using a downloaded or local Whisper model. Choose the language and model in Audio Transcription settings, then monitor Audio transcription in Picture, Caption Data, or Ancillary Data. Audio stays on the computer; model downloads require an Internet connection.
Generated transcripts are derived text rather than embedded broadcast captions. Processing speed, language, background sound, and model choice affect results. Caption Data preserves segment and token metadata for inspection.
Keep a face in view while checking the shot.
ProfessionalWith an Express or Professional Picture pane focused, hold F to frame detected faces as a group, or hold a top-row number 1–6 to inspect one detected face, ordered left to right. Release to restore your previous framing. This is temporary face zoom in Picture. Use Picture face tools, Comparison face matching and Shot Evaluator for current workflows.
Detection depends on the image. An unavailable face number returns to your manual framing. Top-row 7–9 selects the upper grid regions; regular-keyboard 789 / UIO / JKL mirrors the numpad grid.
Inspect one part of Quad Balance.
ProfessionalHold numpad 2, 4, 6, or 8 for a 2× crop with temporary 45-degree rotation. Corner keys 1, 3, 7, and 9 inspect a quadrant without rotation; 5 inspects the center while keeping the current rotation.
Release the keys to return to the saved presentation. See the shared scope shortcuts.
Ask about the scope you are inspecting.
ProfessionalProfessional includes Ask AI for reviewing captured scope images and signal context with a configured provider. Review the attachments before sending. Set up credentials in AI setup; provider API billing is separate from a chat subscription. Cloud review can send the selected images and context to that provider. Local Object Selection and local audio transcription are separate workflows.